Showing posts with label Cosy. Show all posts

Monday, 15 September 2014

Halloween Blanket


I wish I was still young enough to trick-or-treat


Greetings folks! I'm back to give the skinny on my latest project!

If any of you read my Red Heart yarn review, then you may remember I mentioned that the reason I took the plunge and bought the yarn was because I wanted to make a blanket for my son. When I wrote my review on the yarn, I was a few squares in to the blanket, and I'm happy to say that having completed the whole thing, I'm still every bit as in love with the yarn as I was then. Phew!

So to get right down in to it, first I'll give you the basics of the blanket design (I'll link the pattern below for anyone who wants to have a crack at it themselves) it's a fairly simple layout - 9 squares and a border around the edges. Obviously there are varying colours and such, I'll get to that further down.

The squares are solid granny squares, and I have to say I really like how these are constructed. Usually in a granny square - solid or traditional - you increase when you get to the corner space where there's a chain2 gap, and into that gap, you put two double crochet, chain two, two double crochet. With this method you always end up with a little gap in the corners, so it's never completely solid.


there ends up being an X shape across your work


However, using the method in this pattern you get a completely solid, and in my opinion, much neater looking square. The difference is that when you get to the last stitch in a side you do two doubles and one treble in that stitch, then one treble and two doubles in the first stitch on the next side, which makes the point in the corner solid, while also increasing the number of stitches in the next round. 

Each round ends with a slip stitch and the next round starts with a chain3 and continues as before, the only thing you need to watch out for is that you don't accidentally skip the slipped stitch when you get to the end of the next round, otherwise that side will be one stitch short. Because of the way each row is almost fastened off before the next one begins, it made changing colours very easy, and the join between the colours is seamless.

The squares worked up quite quickly, I would be able to get a whole one done while I was sitting watching TV in the evening. Once the squares were done, it was time to start the faces.

The many faces of Halloween


As you can see in the picture above, four of the squares have assorted faces, and one says 'Boo!'. The faces were easy enough to make, although I found with some of them there were still a lot of gaps showing between the stitches when they were finished. For example, the triangle eyes and noses were quite 'gap-y' and so were the oval shaped eyes on the second face from the left in the picture above. The instructions tell you to leave a long tail after you fasten off, so I left an extra long tail and used a yarn needle to weave the yarn in and out of the stitches to fill in the gaps.

The 'Boo!' was slightly more difficult, to make. The two letter 'O's were fine, as was the exclamation mark. The 'B' was slightly trickier, and it ended up looking like a number 8. It took a fair amount of manipulating it, when I was stitching it to the square, to get it to look like a 'B'.

Once all the faces were done, it was just a matter of stitching them on to the various squares. One thing I will say is plan carefully when you're putting the face pieces on to the squares - I'll go in to a bit more detail about this further down. I found the easiest way to get the faces right was to lay the square out flat and then pin the pieces down before sewing them on. It would be extremely rare that I'd pin anything in crochet. In fact, I don't think I've ever done it before, however it was the best way to keep all the pieces in the places you want them, because I found that even the piece I was working on tended to move around a lot as I was sewing it - I'd leave the pins in right until I had the whole piece pretty much sewn on.


Never have I been happier to finish seaming a piece together


Next step was sewing all the pieces together. It said on the pattern to sew the pieces together using the back loops only. It didn't specify what sort of stitch to use, so I used a mattress stitch to give as seamless a join as possible. Mattress stitch is a fairly strong stitch - it's also used to sew sleeves and seams in sweaters, so I figured this would be a good robust stitch which would be capable of standing up to a vigorous toddler.

Sewing through the back loops only was a bit of a faff, to be honest. There ended up being a gap where 4 pieces intersected, which I had to go back and sew tighter when the whole thing was completed. The way I put it together was I sewed the top three squares together, then the middle three, and then the bottom three, so that I ended up with three long strips. I then sewed the strips together. 

I mentioned earlier about planning the layout of the faces carefully, the reason I say this is because when you're sewing the pieces together through the back loops, it's hard to weave in tail ends of yarn neatly. When you lay out your face pieces, do it so that when they're sewn on, the yarn tail from the square will be pointing towards the outside of the blanket. Similarly, when you're sewing the pieces together, rotate the multicoloured pieces so that their yarn tail is pointing towards the outside as well. Obviously, you won't be able to do this with the 'BOO!' square, because it's in the centre. The first round of the border is just double crochets, so the yarn tails from the squares can be woven in neatly and securely with those stitches.

Before your boder is on, the blanket should look like some sort of Halloween amoeba 


Once the pieces were sewn together, the border was a piece of cake. The first round was just double crochets using the grey yarn, then the second round was 'shells' using the black yarn. A 'shell' is when you make a single crochet, skip two stitches, put 5 double crochets in the next stitch, skip two stitches, then repeat all the way around.

So there you have it! The Halloween blanket is finished and my little boy is delighted with it. He's been sleeping under it every night since I gave it to him. I think overall it took me about 10 days to finish it. I really like this pattern, and I think it's something that could be adapted quite easily to be used for a different occasion, like Christmas, Valentine's day, etc.


Yarns: RedHeart.com
2 x Red Heart Super Saver #312 Black
2 x Red Heart Super Saver #254 Pumpkin
1 x Red Heart Super Saver #356 Amethyst 
1 x Red Heart Super Saver #400 Grey Heather
1 x Red Heart Super Saver #672 Spring Green


Thursday, 21 August 2014

Stitch-cation Super Afghan Challenge

Greetings readers! Once again, I have been absent for a while, however I have not been idle, oh no! I've been churning out projects by the barrel-full so I should have plenty of posts coming up with the various things I've made.

Today's post is about my first ever full size crochet afghan/blanket. I made it for the Stitch-cation Challenge on the The Crochet Crowd.com. If you haven't visited their site, I'd really recommend you check them out, it's like a massive community/encyclopedia/educational resource all mashed in to one, and it's AWESOME! They run challenges all the time - you can see details of current and previous challenges on the site - but this is the first one I've actually participated in. 

I started it on the 3rd of July and honestly, I was doubtful I would get it finished in time for the September 1st deadline. I was pleasantly surprised to find that it actually came together quite quickly, I think that was due to the fact that it's made up of smaller squares so you don't end up with this behemoth of a project where it gets to the point that one row can take almost an hour to do. With some of the squares I would finish a whole one in an evening, while watching TV.

This project consisted of squares, each made of one of the following 10 stitch patterns:

Popcorn Stitch
Back Loops Stitch
Cross Stitch
Double Crochet & Slip Stitch
Front Post Double Around Single Crochet
Front Post Double Crochet
Front Post Treble Crochet
Granny Square
Raised Trebles
Front Post Double Crochet With Shells 

You had to make two of each square. I decided to do one out of each pair in a solid colour, and the other in mixed colours. The rules were that you had to use a minimum of 8 colours, and that your border had to have a minimum of 4 rows. I'll list the colours I used in the blanket at the bottom of this post. The border I made had 9 or 10 rows. The border pattern I used was from the Red Heart Holiday Striped Throw, I just changed the order of the colours so that it would suit the layout I wanted.


The instruction e-book said that the aim of the project was to learn more about how to use different stitch types and I definitely learned lots! In fact there are quite a few of these stitches that I've got in mind for future projects. Getting the hang of the patterns was easier than I thought, and there were the step-by-step YouTube tutorials to fall back on if I got stuck. Probably the most difficult bit of the entire thing was trying to decide the placement of the different squares. I must have done at least 10 different arrangements before I was happy enough to crochet them all together. 

The border did take a while, and was slightly awkward because the blanket was fairly big by that stage. Working on it induced a mild form of heat stroke because it was covering my lap while I crocheted around the edges, although at least I know it's going to be nice and warm when the colder weather rolls around. In fairness, although it was a bit of a slog getting around the whole border, it wasn't as tedious as it could have been because I was so excited that it was getting closer to being finished (although I did almost have a nervous breakdown when I had to rip out nearly an entire round because I messed up) Then FINALLY on the 19th of August, I finished weaving in my ends and........TAH DAH!!


I'm delighted with how it turned out! I love all the different colours and textures, and it definitely has given me a wider range of options for other projects in the future. Not saying I'm going to be starting another one of these blankets next week, but I wouldn't rule it out for the future. A lighter weight yarn and lower gauge hook (this was made with Aran weight yarn and a 5mm hook) would make a smaller blanket that would be great for kids or a new baby.


Here's the list of the colours I used, and where I got them:

Pink: King Cole Bounty Aran Shade 133 (from Springwools)
Purple: King Cole Bounty Aran Shade 117 (from Springwools)
Tan/Wheat: King Cole Bounty Aran Shade 113 (from Springwools)
Baby Blue: Robin Bonny Babe Aran Shade 1877 (from Springwools)
Yellow: Tivoli Eurospun Blockbuster Double Knit Shade 566 (from Springwools)*
Grey: King Cole Comfort Aran Shade 313 (from Springwools)
Green: King Cole Comfort Aran Shade 319 (from Springwools)
Mint: Stylecraft Baby Aran Shade 1234 (from Home Focus at Hickeys)

Cream border colour: Stylecraft Baby Aran Shade 1245 (from Home Focus at Hickeys)


*I'm aware the yellow is actually double knit wool, however it was actually the same thickness as the aran wools I used. The aran version of the Eurospun Blockbuster was more like a chunky weight, and would have been too thick for the project.


Sunday, 29 September 2013

Entrelac Hat!


Hi All!

Well first, I must once again apologise for my lack of posts over the summer. What with the unexpectedly warm summer we had, I found it very difficult to actually get any knitting done. I love sitting out in the sunshine (ok, under an umbrella, but watching the sunshine) and knitting along, but it was just so hot that trying to knit anything was like sitting under a woolly blanket, so I ended up packing away my knitting for those lovely sunny days.

A couple of weeks ago, when the weather started to turn, I picked up my needles again and started a new project - Entrelac. This was something I'd never tried before, and any time I'd looked at pictures and videos of it, it looked terrifying! I decided I'd give it a go, so after watching many, many youtube tutorials, I grabbed some chunky wool and thick needles and knit up a sample piece.

It actually turned out to be easier than I thought, once I got into the rhythm of it. The main thing I found was that it was really important to keep count of your stitches, seeing as it's not like knitting straight along until you reach the end of a row, but once you remember to do that then it's a lot less complicated than it looks.

Each winter I've knitted a hat for my son. Unfortunately for him, he inherited my slightly large size head, so it can be difficult to find nice hats to fit him. I decided that this winter's effort was going to be in Entrelac. Knitting it in the round actually turned out to be easier than knitting a flat piece, and I was surprised how straightforward it was, once I'd joined the two sides together. 

I used double knitting wool that I had in the house already, and 4.5mm circular needles. It took me about 2 days to complete, but that was two days of doing not-a-whole-lot else. 

I'm very pleased with how it came out, and most importantly, so is my son! I'm currently knitting one for my husband and one for my mum, so my knitting schedule is going to be nice and full for the next few weeks!

Here's my handsome little man modelling the finished product!


Friday, 17 May 2013

First-Time Cardigan


Well I'm cutting my "garment" teeth on this delightful cardigan here. I'm knitting the navy cardigan in the main picture for my sister.

Yes, I'm aware it's a bloke's cardigan, however she wanted something a bit big and warm, kinda like a woolly version of boyfriend jeans. Her boyfriend will also likely benefit, because she might be less inclined to steal his sweaters once this is finished. 

When I first read the pattern, it seemed a bit daunting, but I'm making good progress with it and so far (touch wood) there haven't been any major disasters. Because the wool is nice and chunky, the size of the pieces increases quickly, which is a nice motivator - you can start to see the piece as part of the finished item, as opposed to knitting something with 4 ply and for ages it just looks like a random strip of knitting which can be almost soul destroying!

I'll post a full write up when I'm finished (hopefully not too far in the future) and I'll also put up pictures of the finished product!

If anyone's got any tips for making clothes, particularly for sewing all the bits together, I'd love to hear them!


Monday, 1 April 2013

Super Cosy Adult Beanie


Ok, I have to start out this post by making a confession; this hat wasn't actually supposed to be for me, it was meant to be for my cousin. He'd asked me to knit him a beanie and I ordered the wool online in a rush, not noticing in the description that the wool has a glittery fleck in it (you can see it a bit in the photo). Obviously, when the wool arrived and I saw the shimmery bits, I knew it wouldn't be any use for a hat for him.........but I thought 'waste not, want not' and I ended up with a lovely hat! (I've since selected a more appropriate wool for a guy in his mid twenties and his beanie is under construction at present.)

This hat was a really easy piece to make, mainly due to the beautiful wool. It's really, really thick and so soft - almost a velvety chenille type texture. I used a circular loom and when I started to knit it, you couldn't see the individual stitches, it produced a rib-like pattern that you can see in the photo above. (By the way, the photo doesn't do it justice by a long shot. I must apologise for my lack of skills as a photographer!)

The whole thing took just under an hour to finish and I'd make another one in a heartbeat. It's definitely the warmest hat I have, and it's lovely and soft, no itching or anything like that. The wool has just the right amount of stretch so that the stitches don't separate when you put the hat on - making it extra cosy!

I've included a link to the wool, below. I'm seriously considering getting another ball to make a matching scarf if this cold snap continues!


Wool from: Springwools 
Loom from: eBay


Monday, 25 March 2013

Stripy Baby Beanie


Well firstly, I must apologise for the length of time between this and my last post, I haven't been very well and also my hubby has been using the laptop a lot for college, meaning that I haven't been able to post stuff (I think it's an excellent reason for me to get a macbook but he's not convinced). Anyhoo, if anyone's been suffering from any ill-effects due to a lack of knitting related news, I'm very sorry.

So on to the matter at hand (or head. Ha!) the lovely colourful hat above. I knitted this on 4mm circular needles, using 100% cotton double knitting wool. It was actually wool I had left over from another project I did so this hat would be a good way of using up numerous 'scrap' balls. 

Obviously, the advantage of using cotton is that it can be easily washed, which is pretty much essential if you're making anything for kids or babies. Also it's hard wearing and not too heavy, so while it's nice and warm, it'll also do for those days when it's not quite cold enough for a massive furry hat, but too cold to go out hatless.

As I said above, I used circular needles for this one. The advantage to using them is that, even though they take a little longer than using a loom, you've got more flexibility when it comes to sizing of the hat (with the round looms if your head doesn't fit the loom size you're pretty much out of luck). I also much prefer the finish you get at the top of the hat when you use circular needles - you can taper it in gradually as opposed to having to make a long tube and then gather it all at the top.

This hat took me about 2 to 3 hours overall to knit, but I did it at periods over a number of days.


Wool from: Go Woolly
Needles from: Go Woolly

Thursday, 21 February 2013

Log Cabin Blanket Patch #2


So this is the second patch in the blanket, and I'm pleased with how it's coming along! My son picked out most of the colours in this patch, I think he has good taste. 

One of the things I'm enjoying most about knitting the blanket is that it's made up of individual patches, so you feel like you've accomplished more as each patch is completed, as opposed to when you're knitting one huge piece and it's only towards the end that you start to be able to 'see the finish line' so to speak. 

I've just started patch number three, so hopefully I'll be posting that up here shortly!

Tuesday, 19 February 2013

Long Loom Scarves


These two scarves were Christmas presents for my sister and my dad, both were knit using super chunky wool and a long loom. For my sister's (the black one) I used a fine shimmery purple wool, along with the main black wool, to give it a bit of sparkle. 

They're quick to knit and I love the pattern the long loom gives in the stitches. These looms are a good idea for anyone who's not great at maintaining the same tension all the way through their knitting, because they keep the knitting and the stitches nice and even.


Similar to the circular looms, the long looms also come in four different sizes. I've seen them online in sets with all four sizes, however in any of my local knitting supply shops, they all seem to be sold individually. Each loom also comes with a pick/hook and a wool needle. 

If you're going to buy an individual one, I'd recommend buying the longest one, simply because there's a greater variety of projects you can use it for - you don't have to use every peg on the loom, so if you wanted to knit a narrow scarf you could use the first 8 pegs, and for wide scarves or wraps you could use the whole length of the loom.


Wool from: Springwools
Loom from: Home Focus at Hickeys


Sunday, 10 February 2013

Snuggly Baby Blanket


This is a really simple baby blanket I knitted while I was pregnant with my son. At the time I started knitting it, I didn't yet know if he was going to be a boy or a girl, so I went with a multicoloured wool in soft baby colours. 

The pattern was a free one that I found online, but I can't for the life of me remember the site where I got it. It starts out with casting on 5 knit stitches and then you use a yarn over increase every row so you gain one stitch each row. You keep going until the blanket is as wide as you want, and then start to decrease. The yarn-overs on each row make a border around  the blanket, and when you decrease each row, you actually decrease two stitches and still do a yarn over, so your row ends up being one stitch shorter.


The pattern showed a blanket that was blue and white, knitted using two balls of wool at the same time. The wool weight was Double Knitting. As I said, I ended up using two balls of multicoloured wool, which I think gave a nice graduated stripe effect, and the colours would be suitable for either a boy or a girl.


I made this blanket to be moses basket/pram size, which was about 160 stitches by 160 rows or thereabouts. In total I used four balls of wool to make it. Basically, I knitted increasing until I got to the end of the first two balls, then I started the decreasing. The number of wool balls you need will vary depending on the meterage of the wool. The link at the bottom shows the wool I used. I also used 4mm x 150cm circular needles. 

I think overall it took me about a three weeks to knit this, however I was working full time so could only knit for an hour or so in the evenings and then longer on weekends. It's definitely a nice straightforward project, and the best part about it is that the size of the piece is completely up to you. The pattern can be used for anything from a dish scrubbie to a king size bedspread!

The pattern goes like this:

(k = knit, yo = yarn over, k2tog = knit two together)

Cast on 5 stitches
1st row: k3, yo, k2
2nd row: k3, yo, k3
3rd row: k3, yo, k4..... 
4th row: k3, yo, k to end of row. Continue until desired width is achieved.
To decrease: k2, k2tog, yo, k2tog, k to end of row. Continue until there are 5 stitches left on your needle.


Needles from: Amazon 


Thursday, 7 February 2013

Loom Knit Wrap


I knitted this for my Mum for Christmas. I mentioned in a previous post that I bought a set of circular looms on eBay, and I used the biggest one to knit this. Not wanting to toot my own horn but it looks way nicer in real life than it does in the picture.

The looms are kind of funny sizes, the smallest one would knit a hat to suit a small newborn, or a preemie. The second smallest would do for a toddler or small child. The second largest one would do for an adult, but as for the biggest one, I don't know what sort of hat you'd be knitting on it. Maybe one for an elephant or something - it's massive. 

This scarf/wrap is about the same dimensions as a pashmina. There are three different types of wool in the scarf, the main wool is a plain black chunky wool, and then I also used Firefly wool at the same time to incorporate some interesting colour and texture. Every ten rows, I would weave in a row of furry wool, and I also had a row of furry wool at the start and at the end.

All in all this took me about 2 weeks to knit, it would probably have been quicker but I had several other Christmas present projects on the go at the same time. I'm seriously considering knitting one for myself also, because it's lovely and warm and the furry wool is really soft!


Wool from: Springwools
Loom from: eBay

Tuesday, 5 February 2013

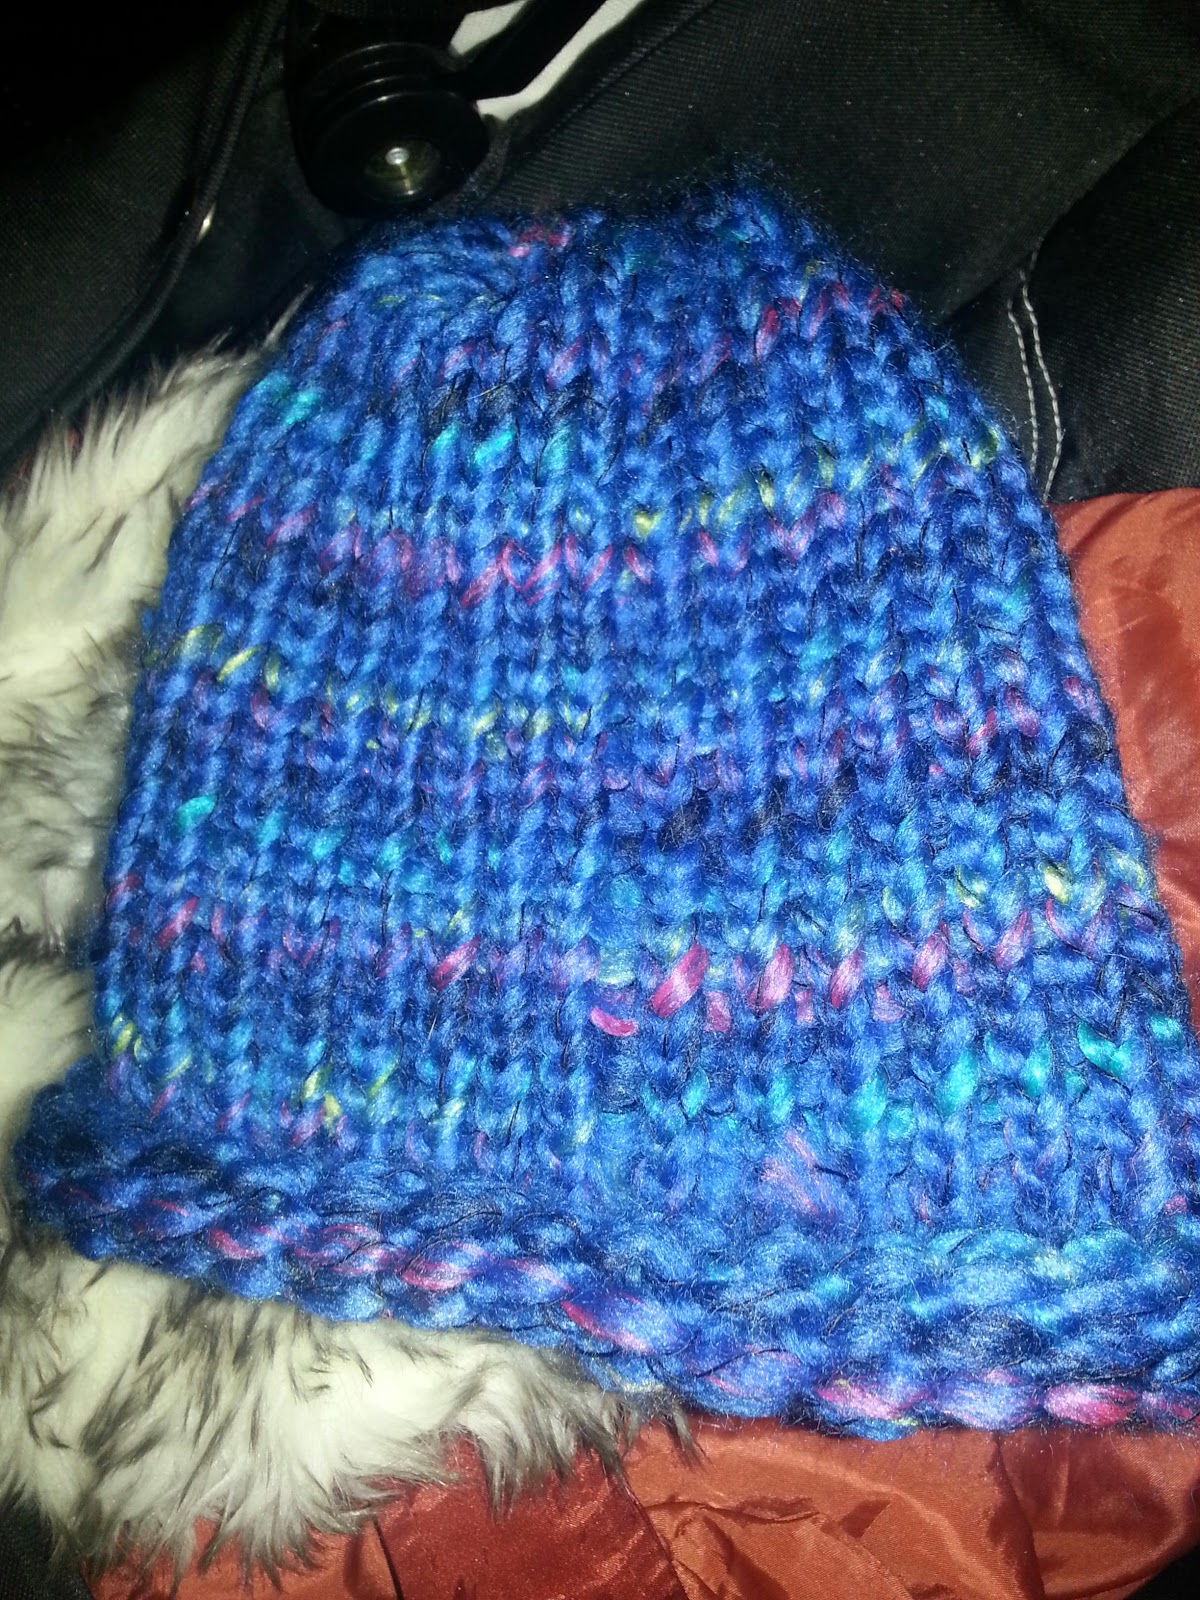
Super Chunky Blue Beanie

I knitted this beanie for my son using a circular loom. It was a quick job, probably 2-3 hours from start to finish. This loom came in a set of four and I used the second smallest one for this hat. It would do a toddler/small child.
Wool from: Springwools
Knitting looms available through various sellers on Ebay.